
Open the Gate! An Interactive Birthday Card with Painted Pumpkins
Sometimes a card comes together that's just too much fun not to share!
I recently created this interactive gate card for one of my Stampin' Up! classes, and after sharing it on social media, I received several requests for a tutorial. So here it is!
The best part? The Painted Pumpkins Dies make creating this interactive gate surprisingly easy! With a few die cuts and a little clever assembly, you can create a gate that actually opens to reveal a hidden birthday greeting.
For my card, I paired the rustic wooden gate with warm autumn colours, pumpkins from the Glow of Harvest Designer Series Paper, and a little hanging birthday sign from the Reason to Celebrate stamp set.
Let's make one together!
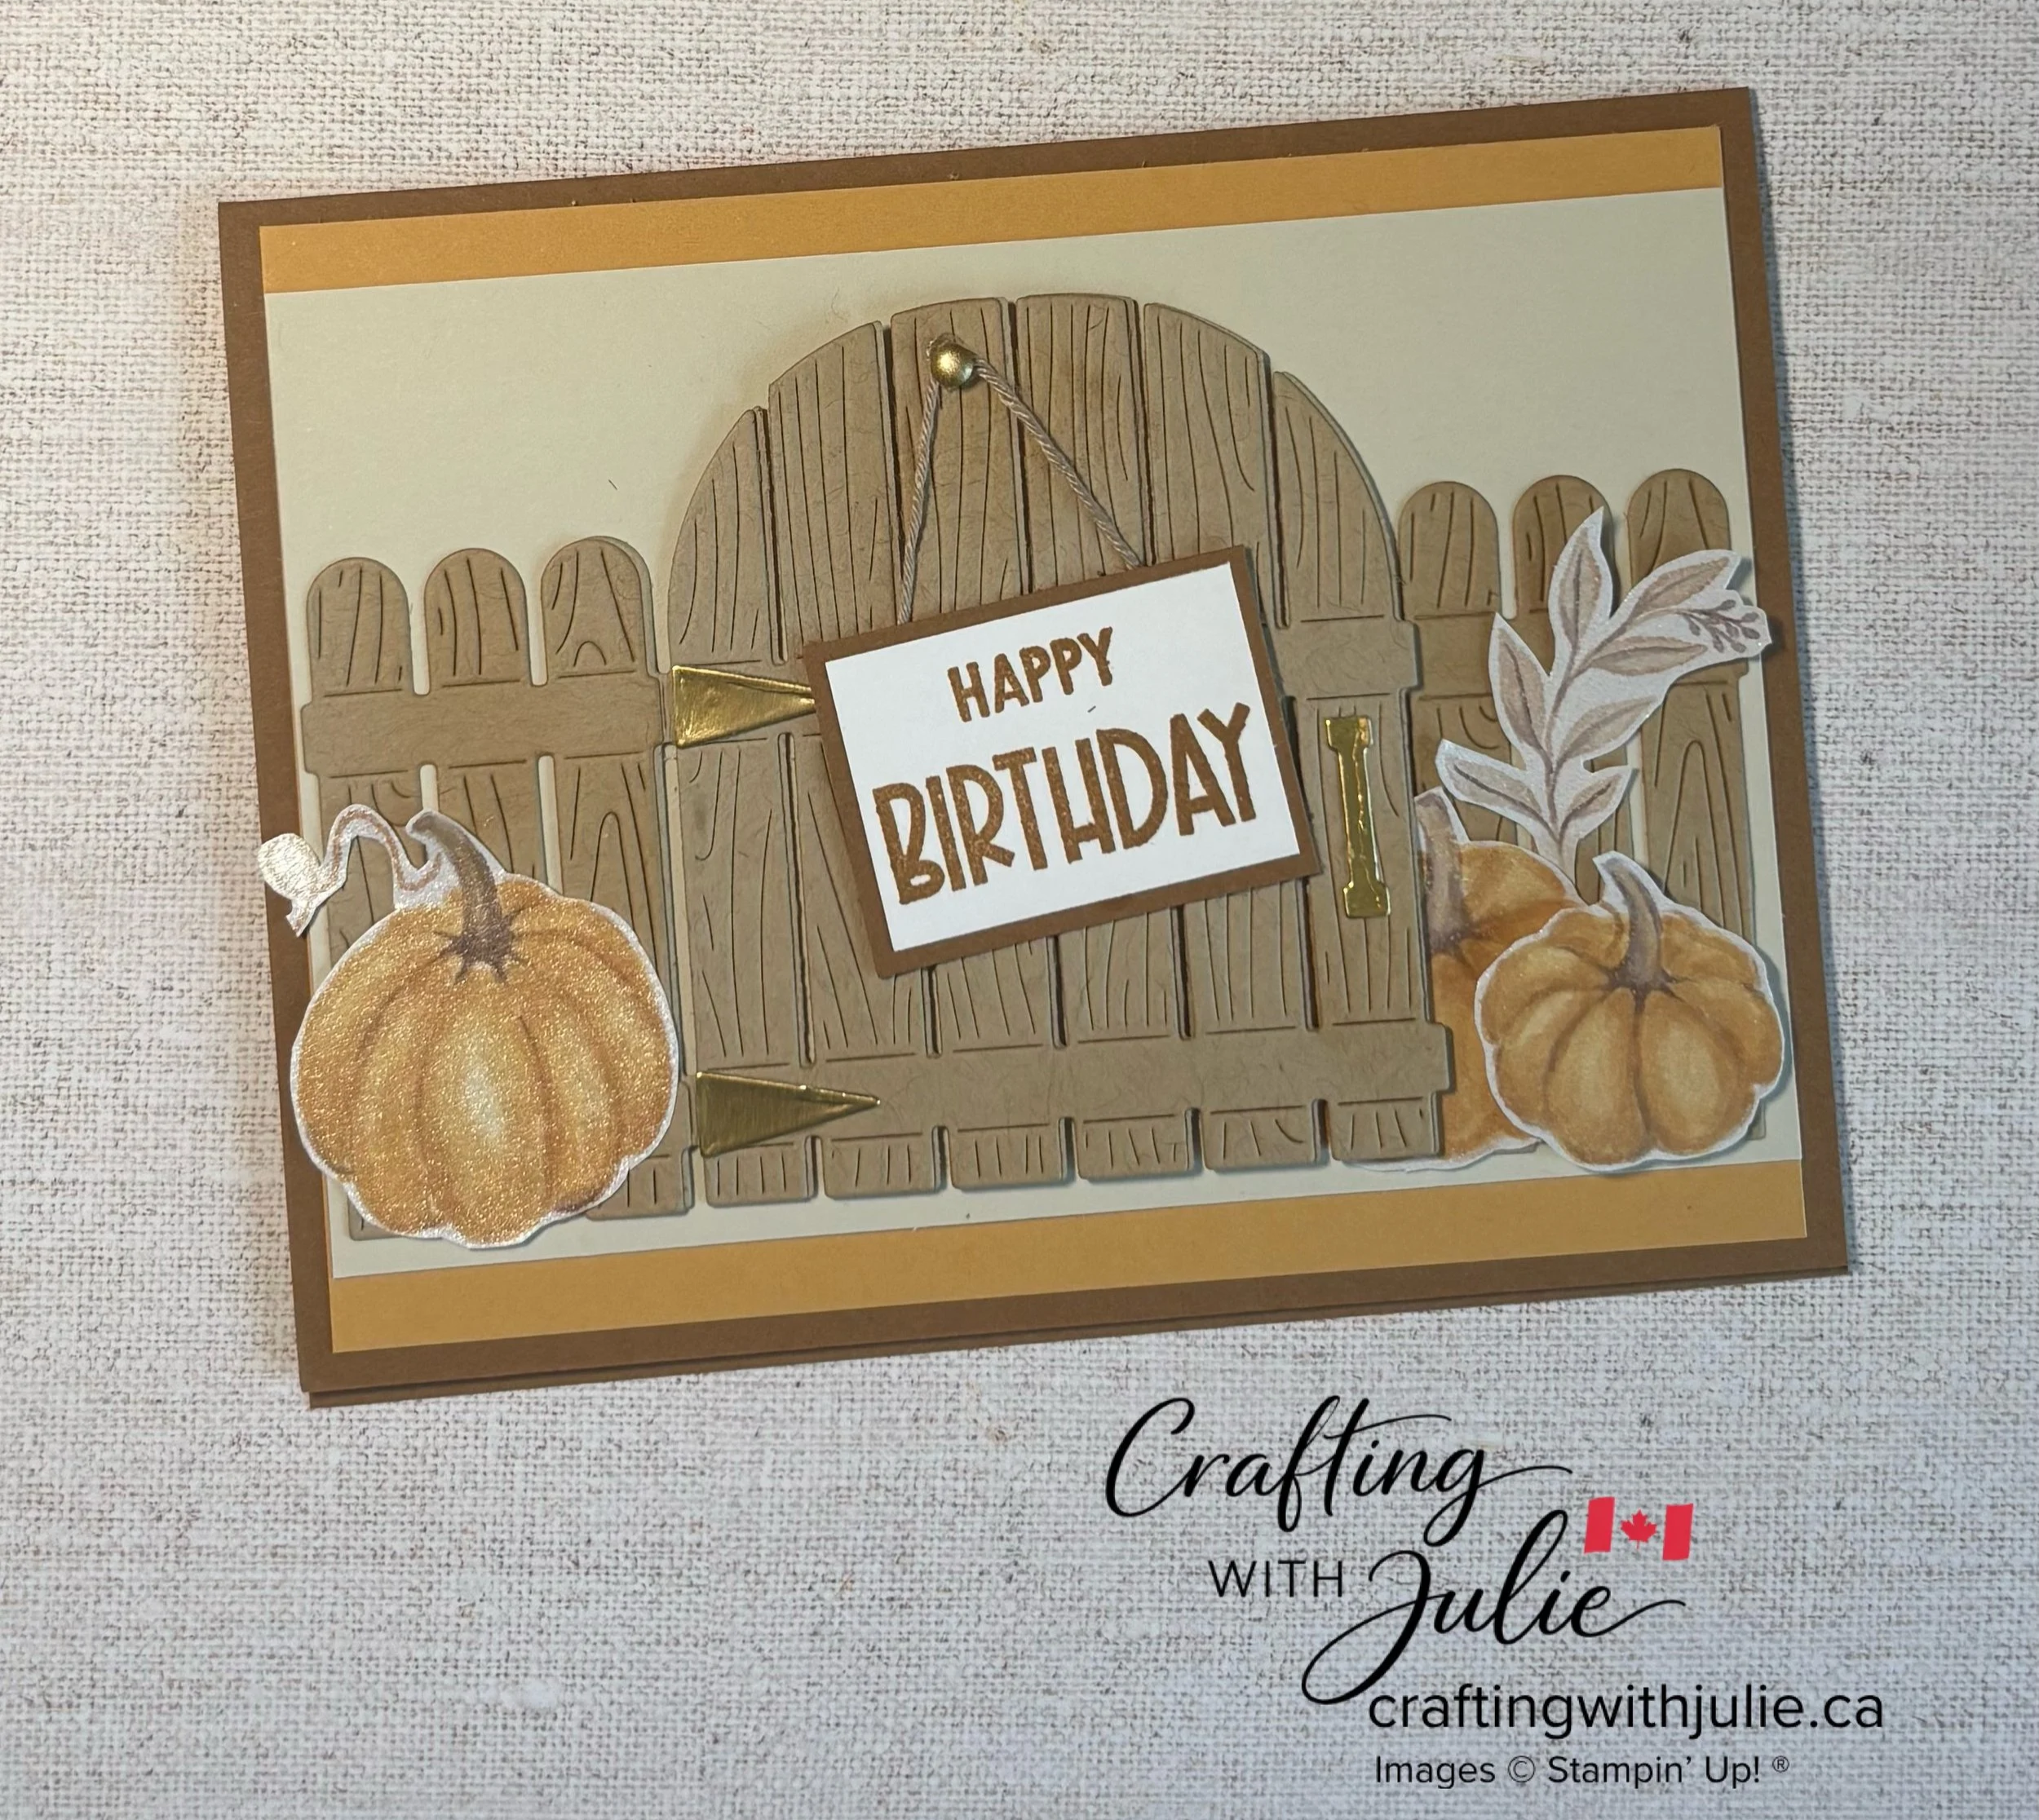
Open the Gate card - using Paper Pumpkin dies
Watch the Video Reel
Want to see how this interactive gate card comes together? I've created a full video reel assembling the gate, attach it to the card front, and adding those finishing touches.
Watch the Reel below, then follow along with the written instructions and photos in this post.
The written instructions below include the supplies, cutting measurements and step-by-step photos to help you create your own version.
Supplies You’ll Need
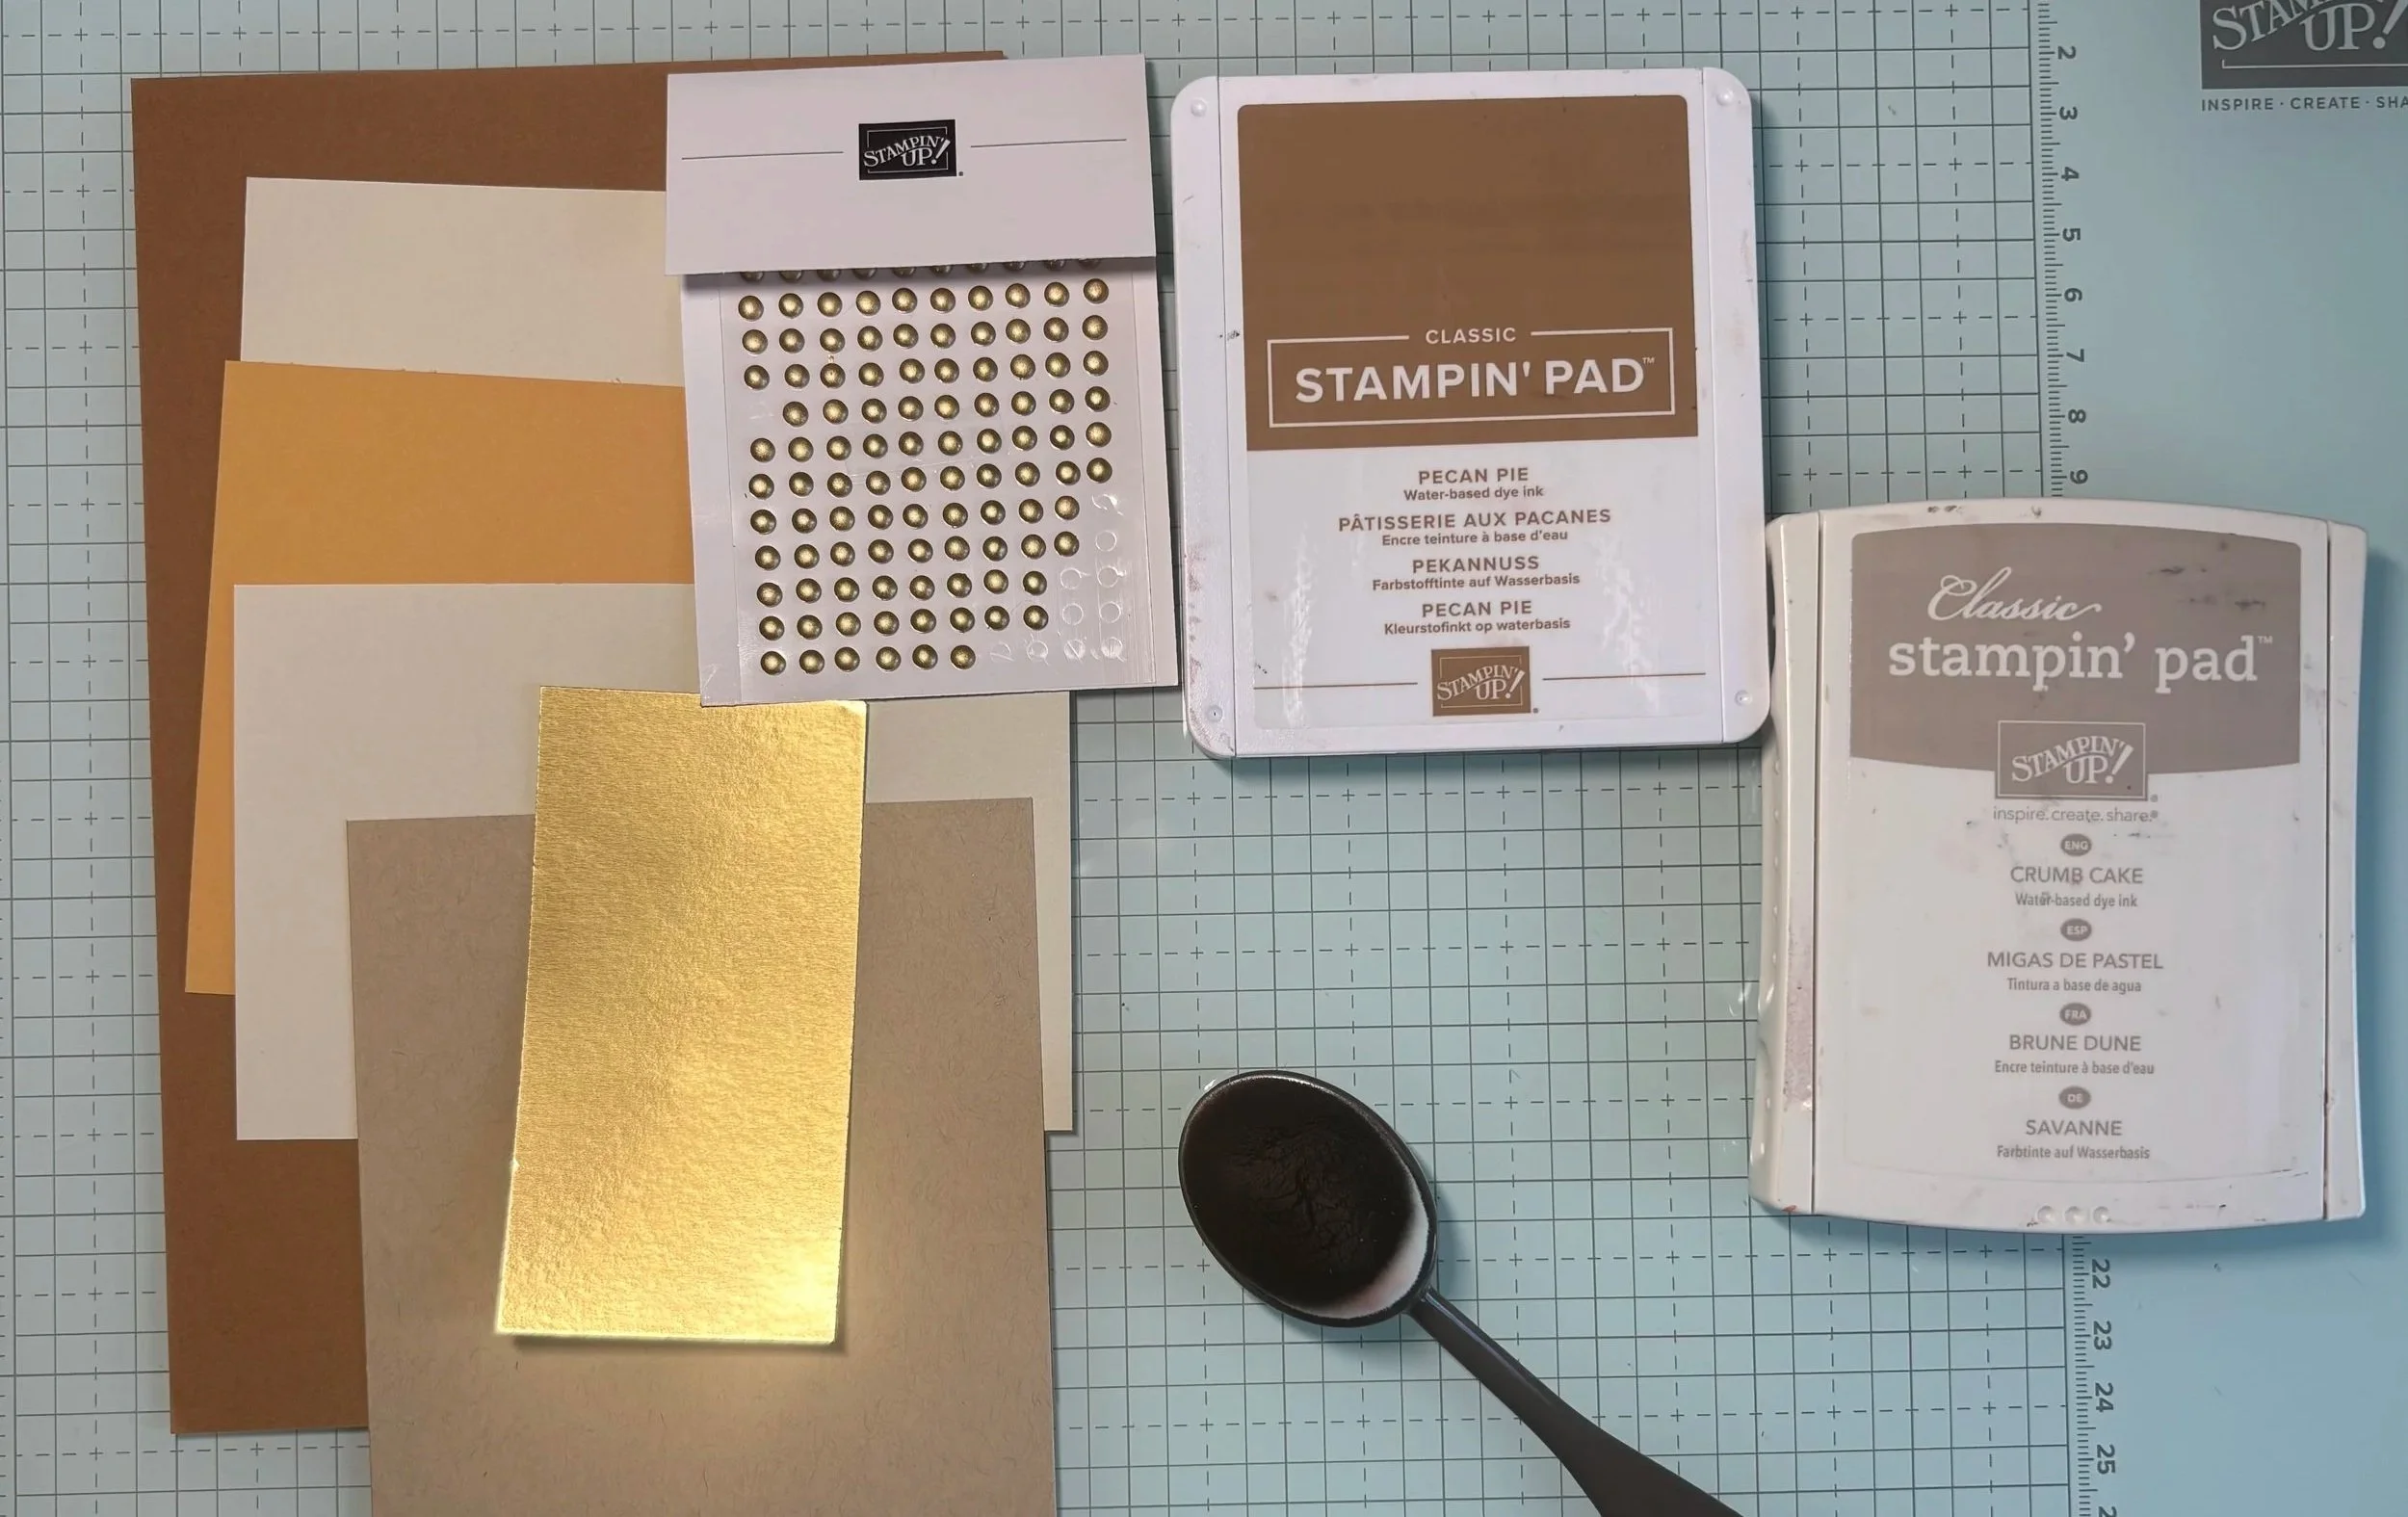
Stamps and Dies
Painted Pumpkins Dies
Reason to Celebrate Stamp Set
Cardstock and Paper
Pecan Pie Cardstock - Card Base: 5.5 × 8.5, scored at 4.25, Small piece for sign: 1 5/8 × 1 1/8
Golden Glow Cardstock - Card Front: 4 × 5.25
Basic Beige Cardstock - Card Front: 3.5 × 5.25
Basic White Cardstock - For the Happy Birthday sign: 1.5 × 1
Crumb Cake Cardstock - For Gate and Fence
Gold Foil Sheets - For Hardware
Glow of Harvest Designer Series Paper
Ink and Colouring
Pecan Pie Classic Stampin' Pad
Crumb Cake Classic Stampin' Pad
Golden Glow Stampin' Blends
Blending Brush
Embellishments and Adhesives
Gold Adhesive-Backed Dots
Linen Thread
Multipurpose Liquid Glue
Stampin' Dimensionals
Tools
Stampin' Cut & Emboss Machine
Paper Trimmer
Paper Snips
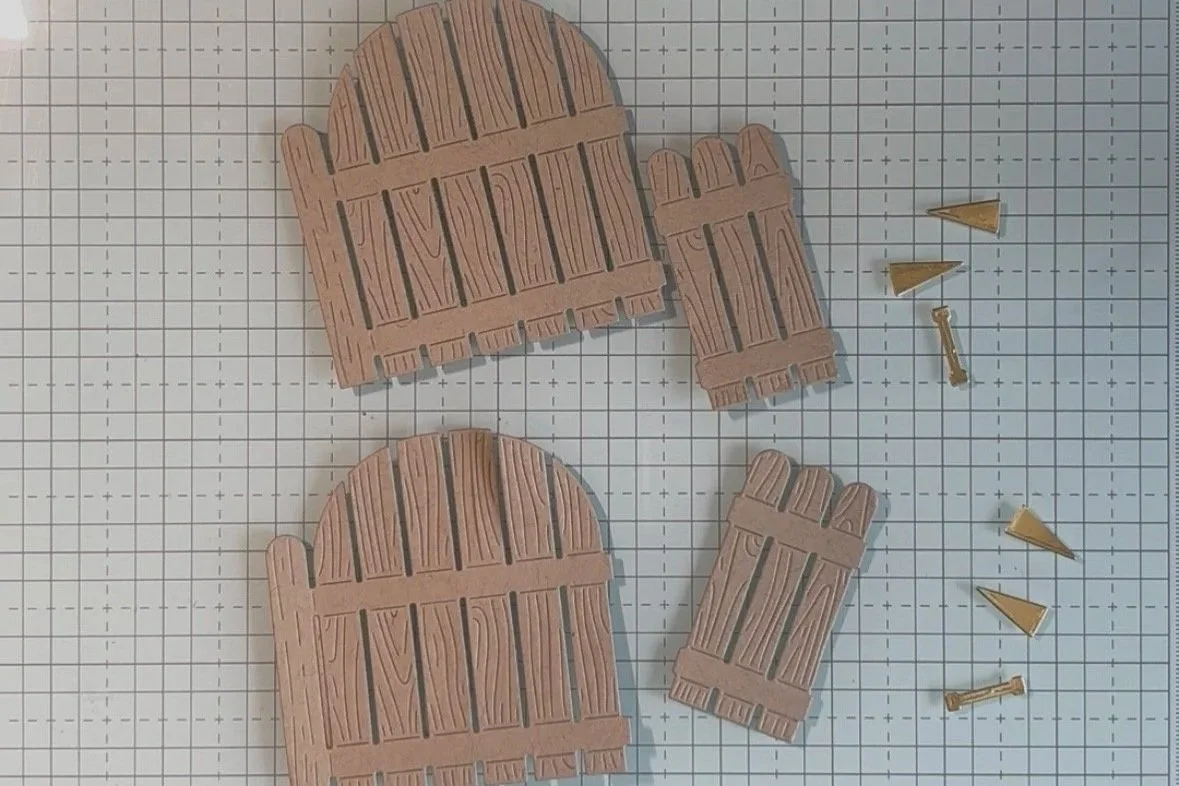
Step 1: Prepare Your Gate and Fence Pieces
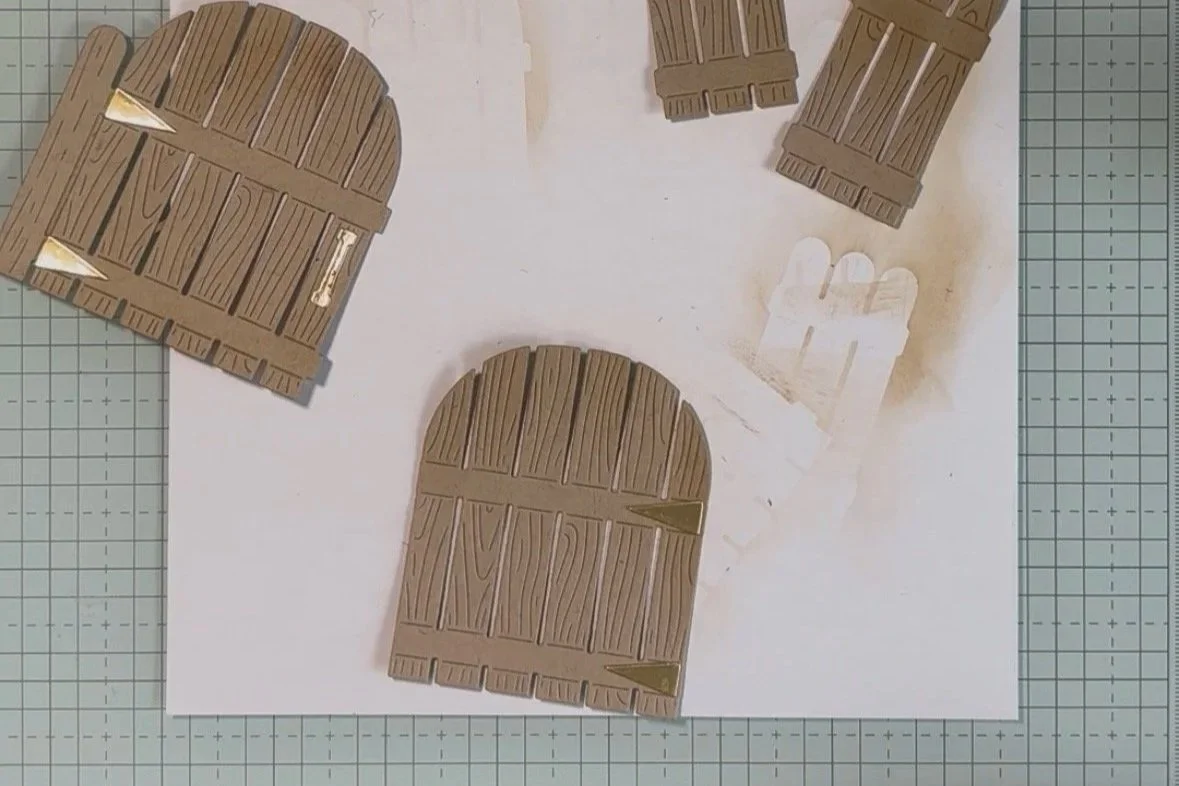
Using the Painted Pumpkins Dies, cut the following pieces:
2 gates
2 fence pieces
2 sets of gate hardware
I used Crumb Cake Cardstock for my gates and fence pieces and Gold Foil Sheets for the hardware.
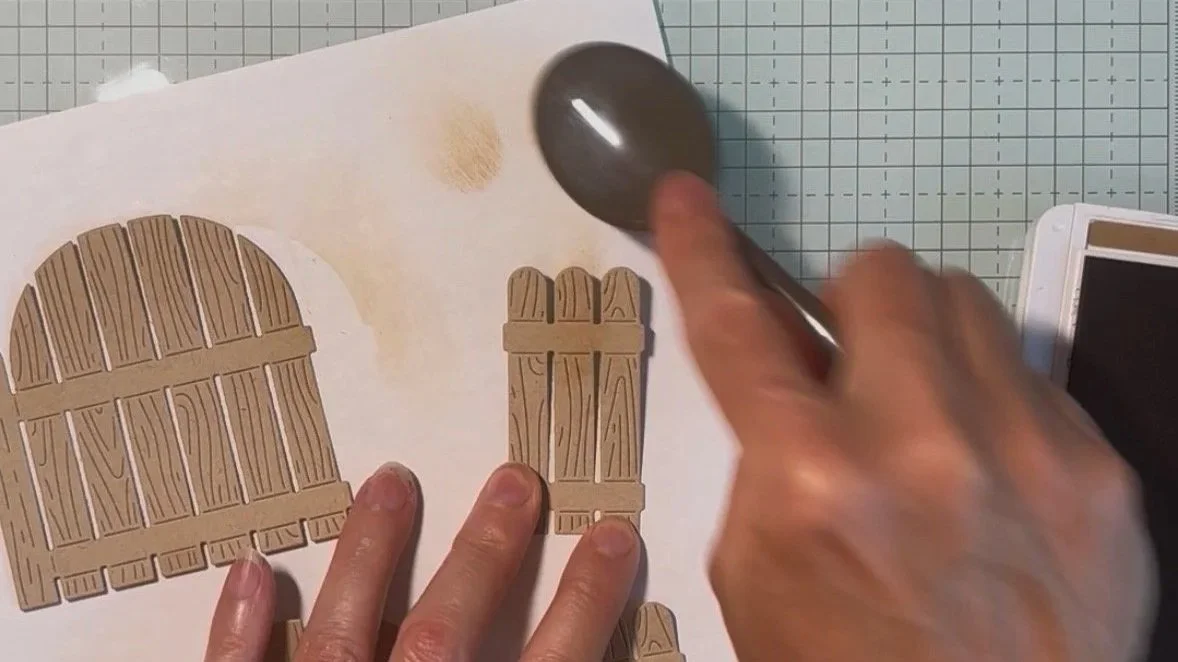
Using a Blending Brush and Crumb Cake ink, lightly blend over the gates and fence pieces to bring out the woodgrain details and add a little dimension.
You don't need a lot of ink here. Just enough to give the wood a slightly weathered appearance.
Step 2: Assemble the Gate
This is where the magic happens!
Start with your first gate die cut — the one that includes the single fence post along the side. Attach the gold hardware to the front of the gate.
Next, take your second gate die cut and carefully cut away the single fence post. We'll use this piece to reinforce the back of the gate and give it a little extra sturdiness. Attach the second set of gold hardware to this gate piece, positioning it on the opposite side from the hardware on the front gate.
Now adhere the two gate pieces together, lining them up carefully.
You should have a sturdy, double-layered gate with hardware visible on both sides.
Step 3: Make Your Gate Interactive
Here's the clever part!
Take one of your fence pieces and line it up with the single fence post attached to your gate.
Apply adhesive to the fence post and adhere the fence piece directly on top, making sure everything is lined up.
The die creates a score mark between the gate and the fence post. This is what allows your gate to bend and open!
Gently fold along the score mark to make sure your gate opens and closes smoothly.
Step 4: Attach the Gate to Your Card
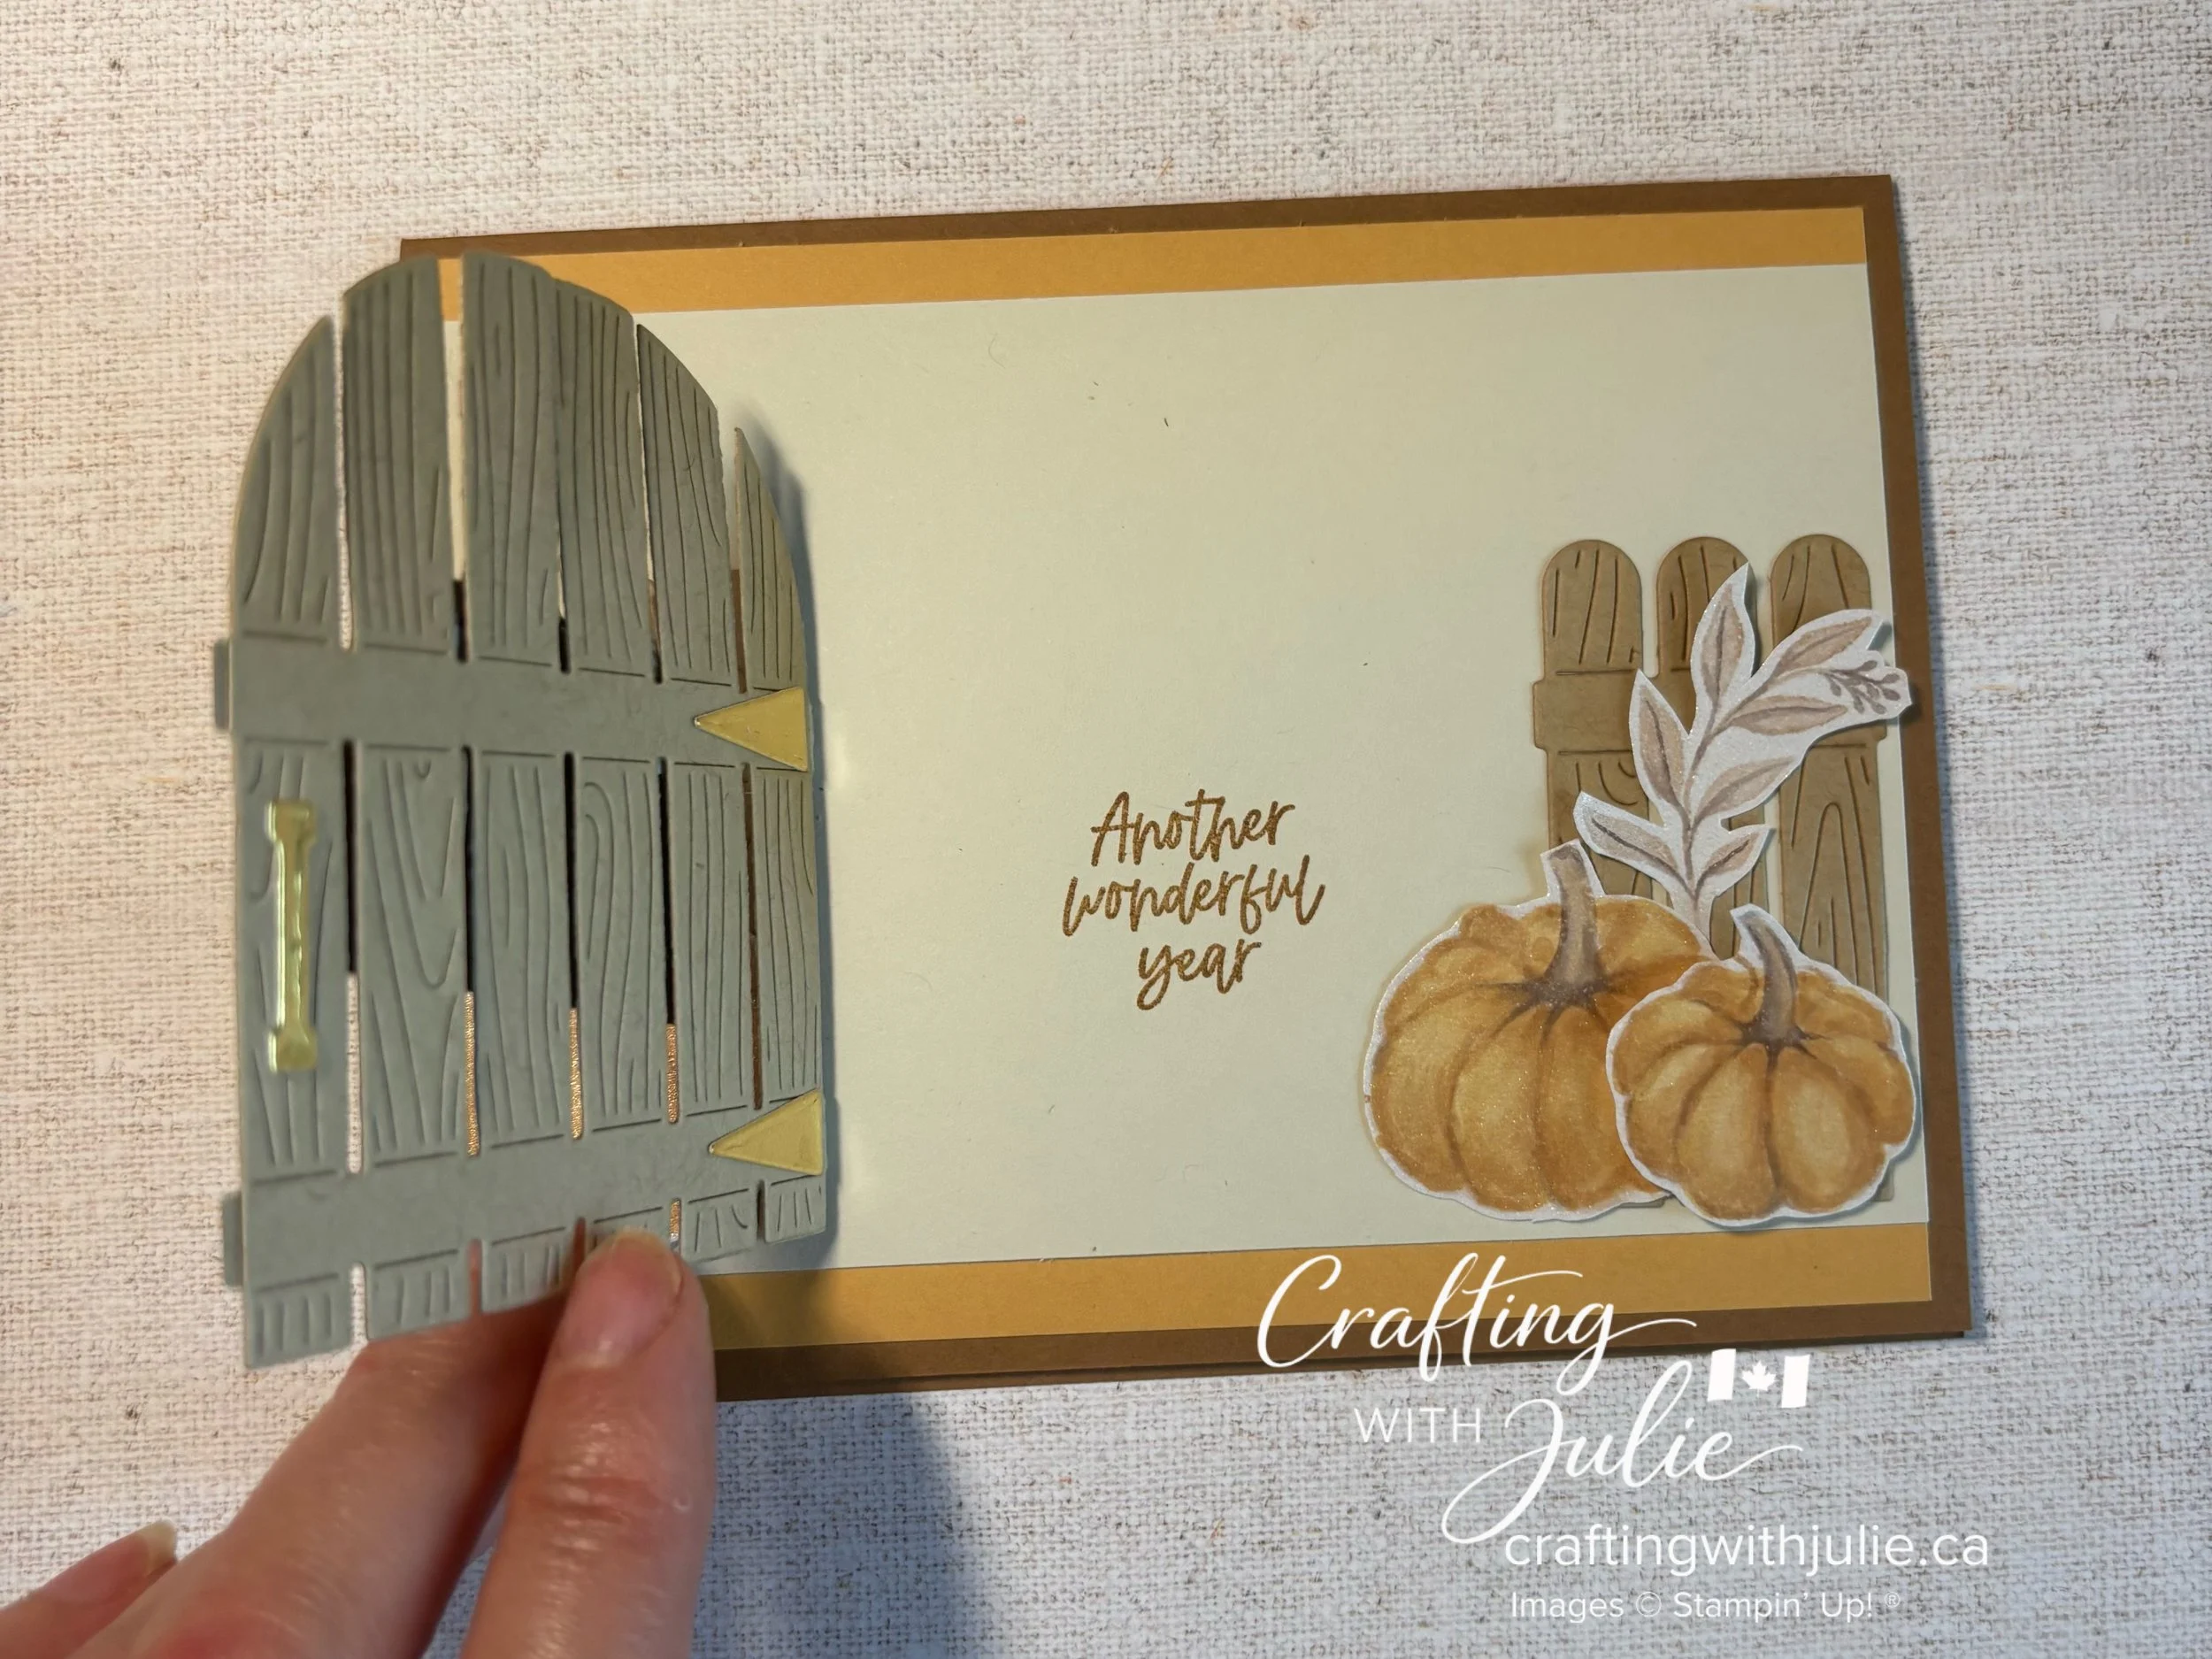
Position your assembled gate on your card front.
Apply adhesive to the three-post fence section only, then adhere it to your card front.
Be careful not to glue down the gate itself — we want it to open!
Next, line up your second fence piece on the opposite side of the gate and adhere it to the Basic Beige card front, and then mount that on the Golden Glow piece, before adhering everything to the Pecan Pie Card Base.
Your interactive gate is now in place! Open and close it a few times to make sure everything moves freely.
Step 5: Create the Hanging Birthday Sign
I wanted my gate to look like it had a little wooden sign hanging from it.
I stamped the Happy Birthday sentiment from the Reason to Celebrate Stamp Set and mounted it on a slightly larger piece of Pecan Pie Cardstock to create a frame.
Next, I added adhesive to the back of the sign and attached a small piece of Linen Thread, creating a triangular hanger.
Pull the thread into a neat triangle and position the sign on the gate. I added a Gold Adhesive-Backed Dot at the top of the thread to look like a little nail holding the sign in place.
Such a simple detail, but I love how it finishes off the gate!
Step 6: Add Your Hidden Birthday Greeting
Of course, an interactive card needs a little surprise inside!
I stamped "Another wonderful year" from the Reason to Celebrate Stamp Set directly onto the card front, positioning it so the sentiment is hidden when the gate is closed.
When the recipient opens the gate, the greeting is revealed!
Step 7: Decorate with Pumpkins
Now for the finishing touches!
I fussy cut several pumpkins from the Glow of Harvest Designer Series Paper, which was Stampin' Up!'s August Product of the Month.
I coloured the pumpkins with Golden Glow Stampin' Blends to give them a little extra warmth and richness.
Arrange the pumpkins and foliage around the fence and gate, being careful not to interfere with the opening mechanism.
And that's it! Your interactive gate card is ready to send.
A Fun Card for Any Occasion!
Although I made this one as an autumn birthday card, you could easily change the look for another season or occasion.
Imagine a Christmas gate decorated with greenery and a wreath, a spring garden gate surrounded by flowers, or a little welcome sign for a new home!
The Painted Pumpkins Dies make it easy to create the gate, and the decorating possibilities are endless.
I hope this tutorial inspires you to give it a try!
I'd love to see your version!
If you share your card on Instagram or Facebook, be sure to tag Crafting with Julie so I can see what you've created. 💕
Shop the Supplies
Love this card? You can shop the Stampin' Up! products used to create it through my online store. I am an Independent Stampin' Up! Demonstrator in Canada. My online store serves Canadian customers.